Did I finally learn to Projection
map? Did I manage to polypaint in z Brush? Well this post will answer your
question. Or maybe you didn’t care in the first place. That’s cool with me.
Have a tree that looks like its screaming.
I finished the modelling the
hollowed out foliage assets on Monday and the next following two days was
devoted to unwrapping them appropriately, using the cylindrical unwrap. The
most important events of this week was the projection mapping in 3DS Max and
the polypainting in Z Brush.
Thursday was when I first learnt
to Projection Map. Projection mapping is one of the alternatives to creating a
height map to create a normal, the other known technique to me involves,
creating a higher poly model and baking it down to a lower poly one. In projection
mapping, you create a model of the object or pattern that you want to put on
your normal map. The positive to this is that you get a clean normal map, but
it can be quite time consuming, but lucky you don’t have to be that clean with
the geometry and can turbo smooth it.
 |
| In the
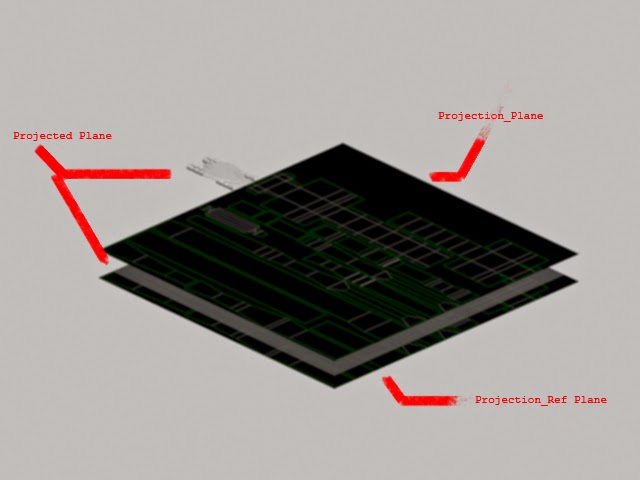
Projection mapping I was taught, I ended up using 3 layers of planes. The bottom
plane, The Projection_Ref plane is the template unwrap of the model I'm creating a normal map for. This is used to plan out the layout of the map. The projected plane is the plane which will create the normal map, I was recommended that everything your mapping should be attached just to keep the file clean. The projection_plane is the plane in which the normal map will be created on. |
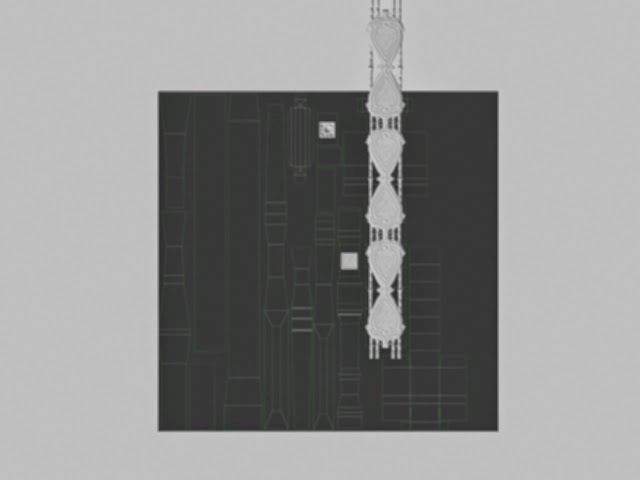 |
| Current look of the projection plane. |
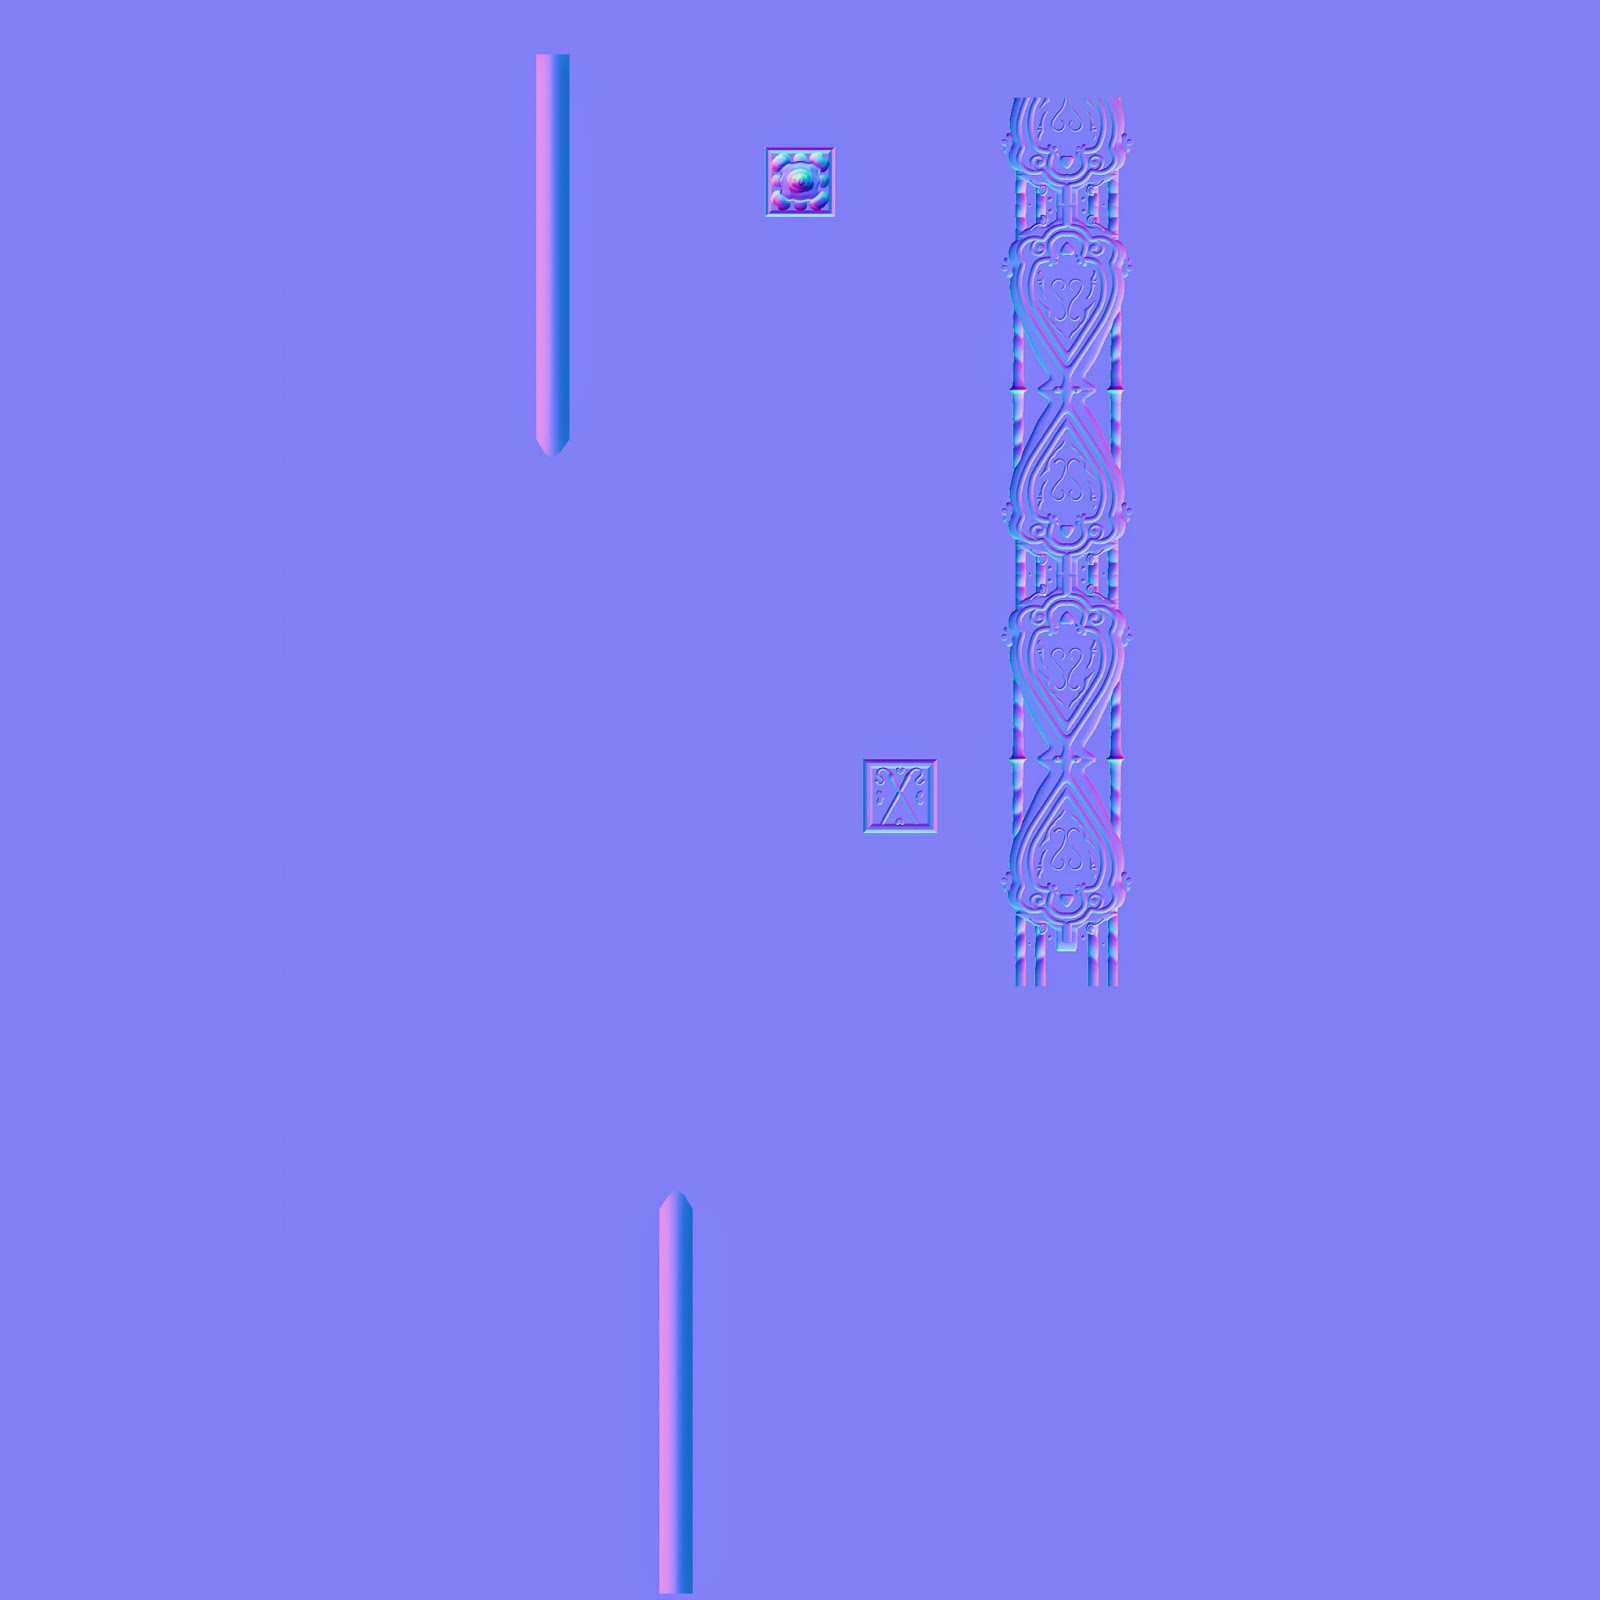 |
| The produced normal map. You do have to do some slight edits in photoshop to make sure it's perfect for the template. |
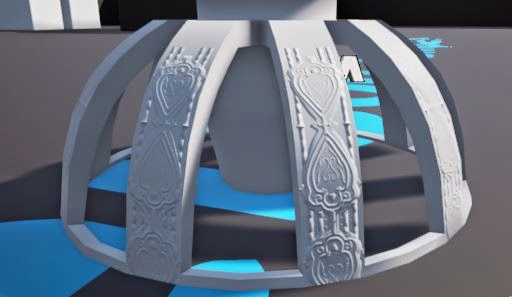 |
| The normal map in use in engine (Unreal 4) on the model. |
Friday was filled with learning
to poly paint in Z Brush. This was surprisingly simple, and was taught some
really good tips involving this process. I was taught to put all reference images
on a photoshop file and save as a jpg, before placing it in the textures and
painting with these pictures straight onto the model with spotlight. I’ve
already seen a marked change in my textures with them already looking better. I also taught myself how to use the layers in zbrush to allow me to paint on multiple layers of the same object, so the texture below isn't affected.
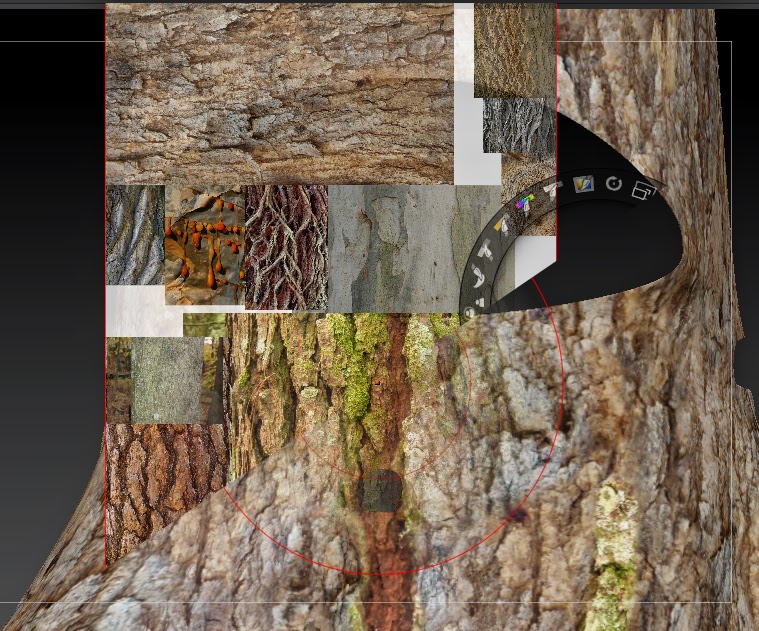 |
| A combination of screenshots, top left side the active spotlighting, where you change numerous variables of this program. The bottom right in paint mode in the spotlighting, where you paint straight onto the model. |


No comments:
Post a Comment